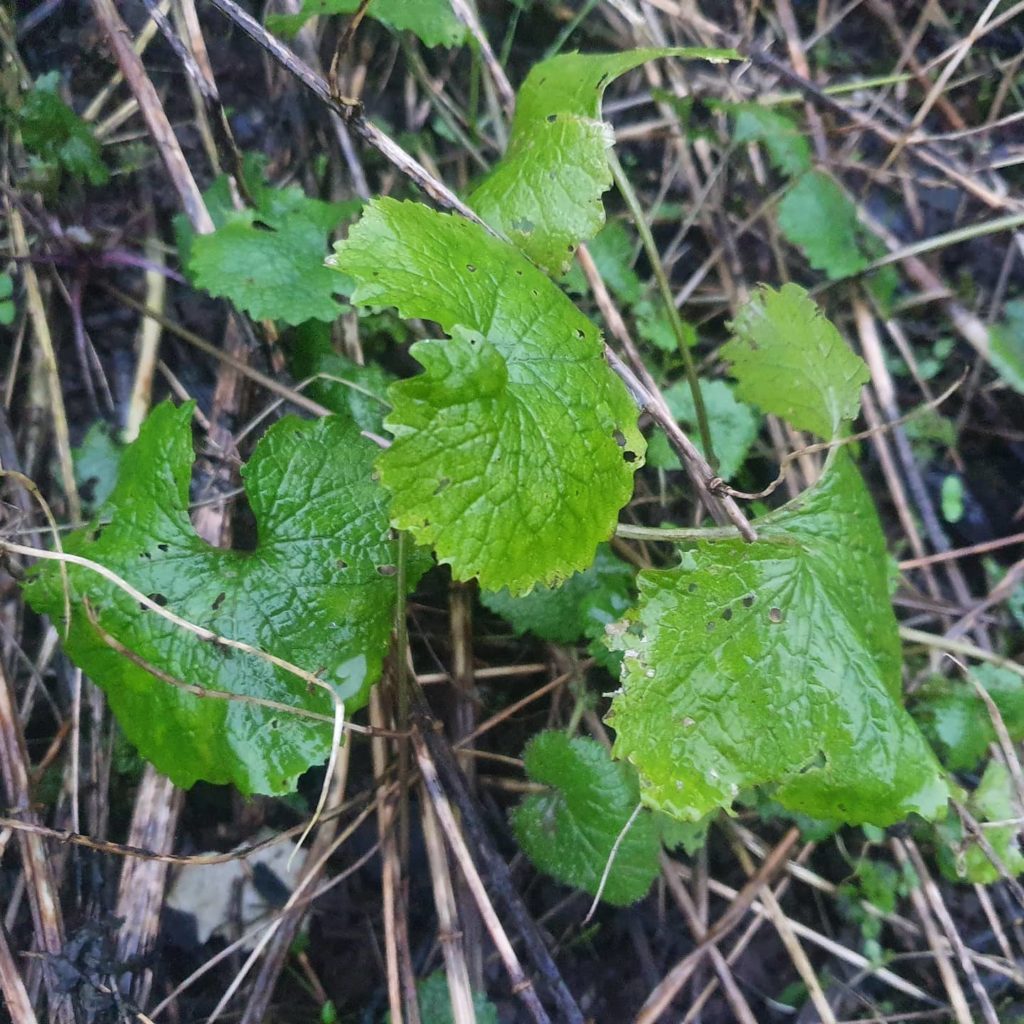
Jack by the hedge, otherwise known as Hedge Garlic or sometimes even just wild garlic – is actually not a garlic at all!
Name: Alliaria Petiolata
Location: Anywhere, usually grass verges, woodlands and tucked alongside hedges
Months: March to September
Edible Parts: Leaves, Flowers, Seeds
More Information
Hedge Garlic is a member of the mustard family – hence it’s familiar flavour and smell that reminds us of garlics. There are actually quite a few plants that could be called under the common name ‘wild garlic’ so it’s important to be able to differentiate between them. Hedge garlic is quite distinctive with its beautifully shaped lobed leaves. It’s a more delicate flavour than actual alliums provide so it’s more suitable for delicate touches of garlic/mustard flavouring such as in salads eaten fresh.
This little herb is often overlooked but it’s so much fun I highlight at every chance I get.
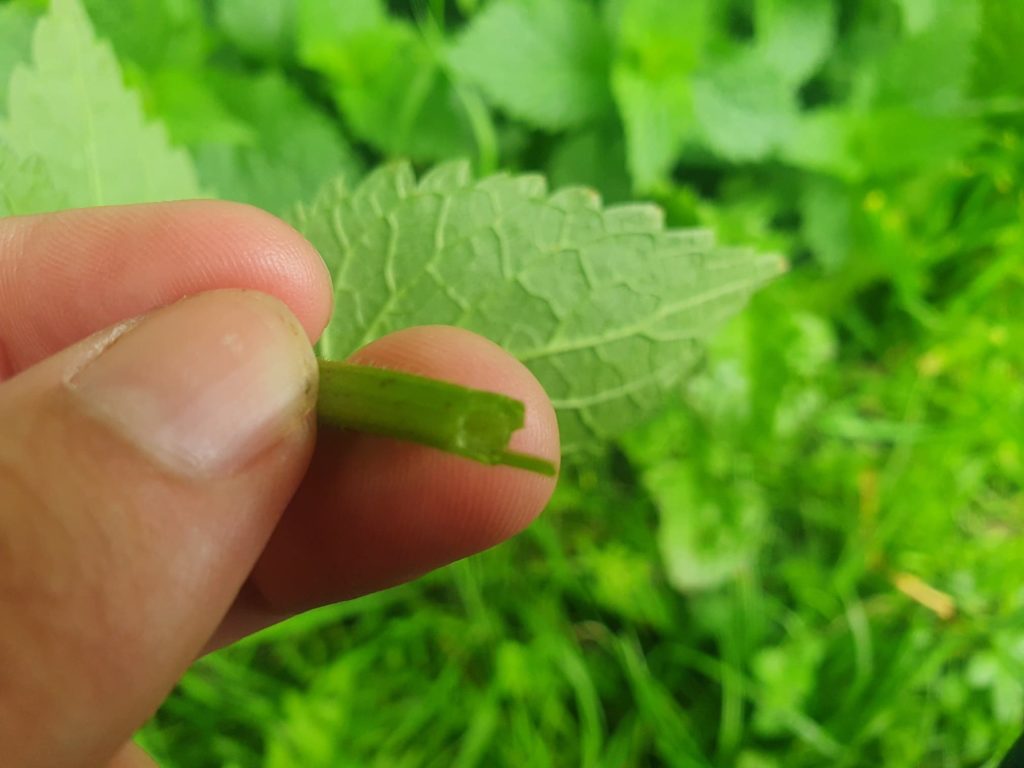
Lamium album is actually a member of the mint family (Lamium). We can tell this, because of it’s stem. Yes, have a closer look at it’s stem next time you see it. Feel it between your fingers and you will notice it is flat and square shaped! We can see this if we cut the stem too.
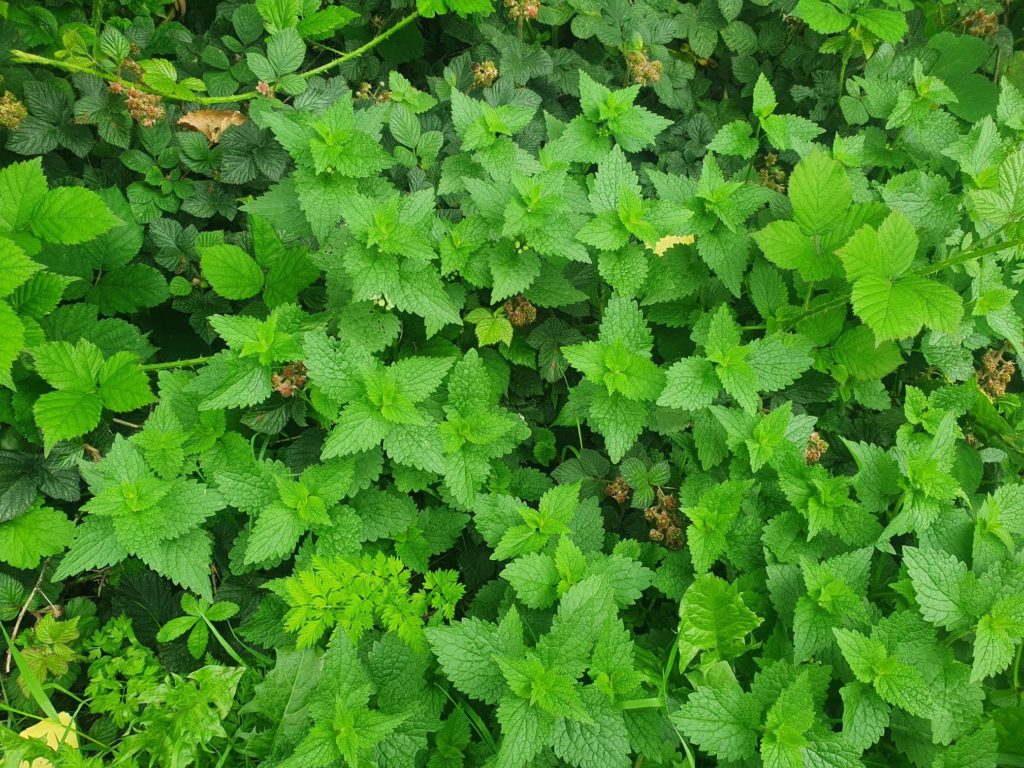
But many of us go by the humble white dead nettle without a second thought, because it looks very similar to common stinging nettles and often grows amoungst them. In fact, many think they are one and the same! Luckily, mixing these two plants up won’t kill you, but it goes to show how much identification work is really needed to stay safe and accurate.
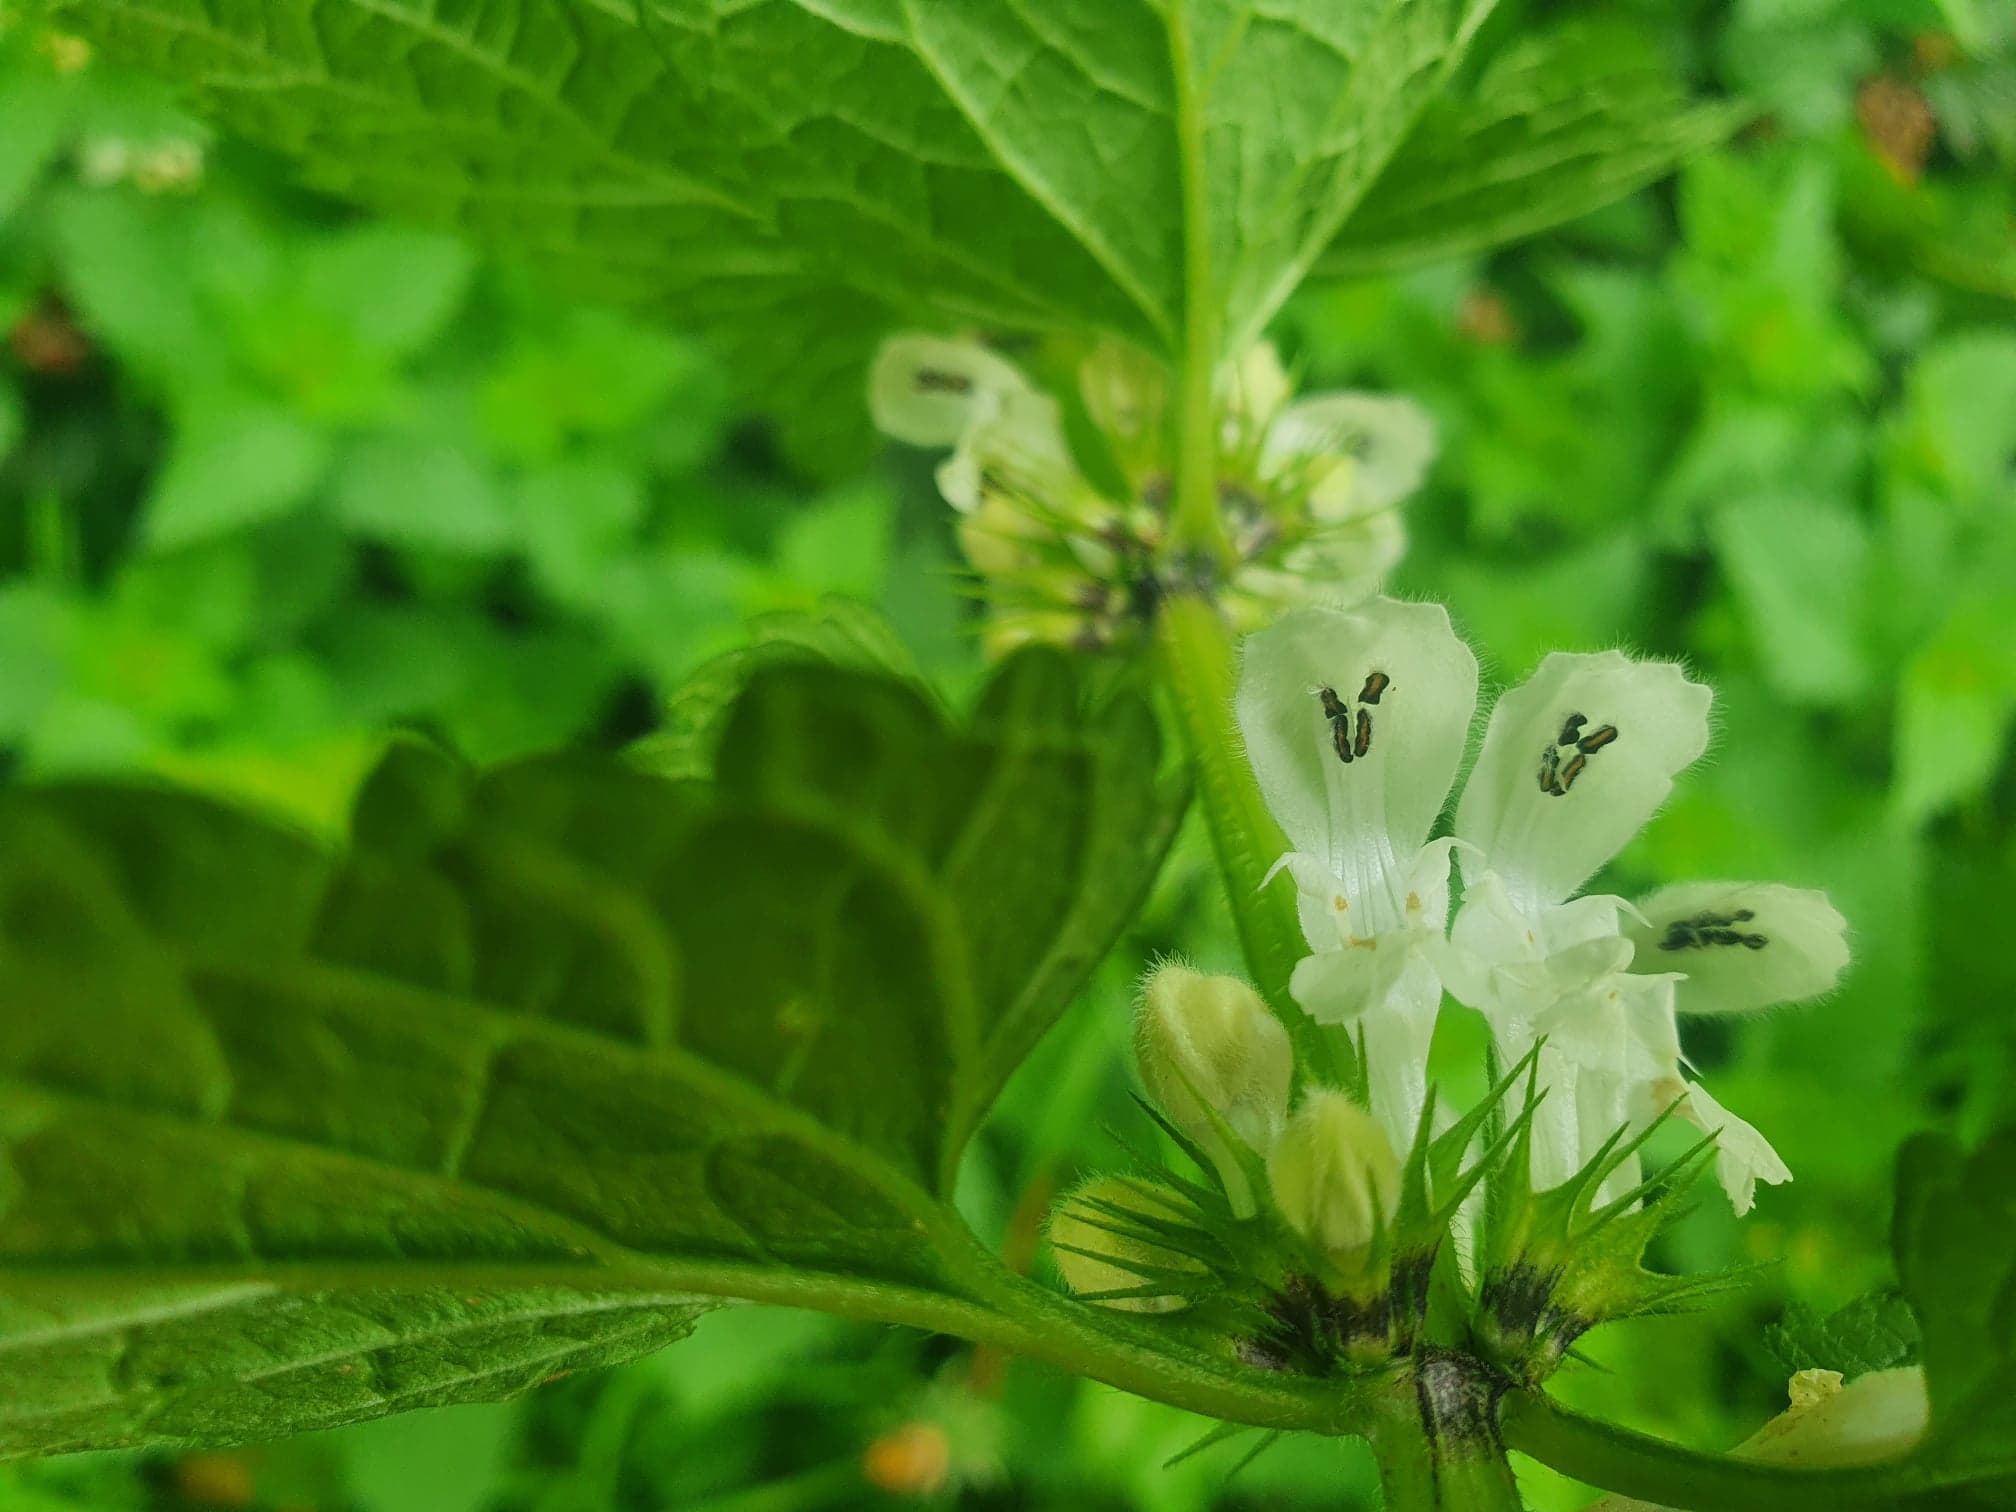
Unlike nettles, dead nettles do not sting you and they have large prominent orchid like flowers you can easily see at a glance.
Unlike Mint, deadnettles don’t taste of anything nice and minty. I often describe the taste as simply “green”. But as a filler for stir fry greens or other mixes they do all right.
It’s these lovely little white flowers that we are after in particular. If you are careful, and pick the flower from as close to the plant as possible, you get a good amount of the nectar inside there. These flowers (I kid you not) taste like mushrooms. First they taste of not much in particular, and then if you picked them carefully enough, you get an after taste develop that is dinstinctly mushroomy. This makes them a brilliant savoury garnish to really amp up your cooking presentation game. My go to dish for these beauties is mushroom risotto. PERFECT.
Location: Anywhere, usually grass verges, pathcracks, fields and park pathways
Months: All year round
Edible Parts: Leaves, Seeds
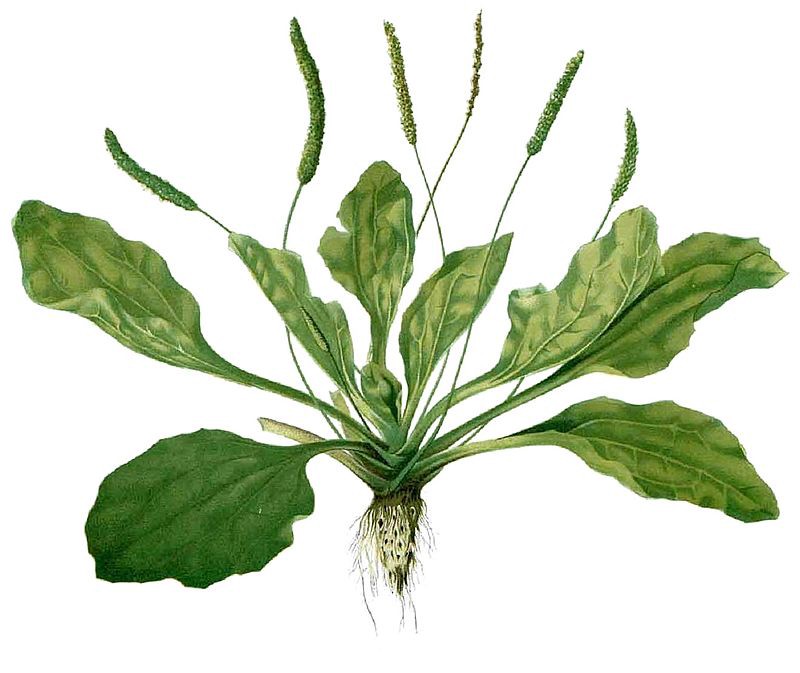
Placeholder image of plantain
More Information
Plantain is a common wild edible found all over the UK. The three main types in the UK are Major, Media and Lanceolata but coastal regions will also discover maritima and ponds/lakes may be blessed with Aquata. Plantain has trade mark ‘ribs’ (hence the name ribwort) along the underside of the leaf which are the prominent veins of the leaf. they run parrallell along the leaf and do not intersect. When the leaf is pulled apart the stringy material inside the vein is revealed.
Plantain is not only edible (best eaten when young and fresh) but it is also used in herbal medicine as it is packed full of anti histamines. this makes it useful as herbal tea to treat hayfever or infused in oil to treat stings and other skin reactions – in particular nettle stings.
The seeds of plantain are highly nurtitious if you catch them at the right time of year.
How to Make a Plantain Oil Infusion (for topical use)
Collect your plantain leaves (any variety) and roughly chop.
Spread the leaves our on a tray and dry them out, Ideally you would use a dehydrator at 45 degrees or less for this task but if you do not have one then you can sun dry or use your oven on its lowest setting with the door ajar. Be careful not to burn the leaves (they will turn brown is overheated).
Once fully dried, stuff as many leaves as you can into a clean dry sterile jar. Then top up with olive oil (or another base food grade oil) and ensure the leaves are submerged and there are no air gaps.
Leave in a cool dark place for 3-6 months to infuse. Strain before use.
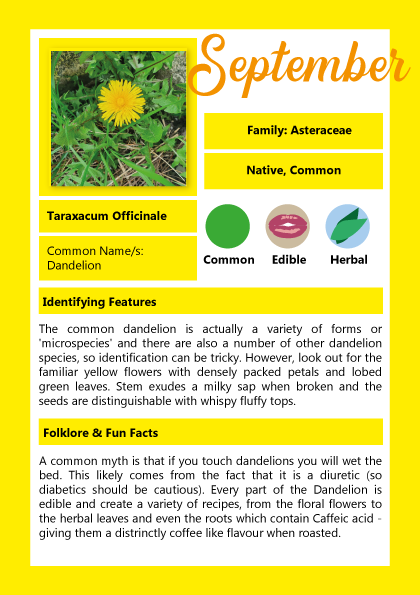
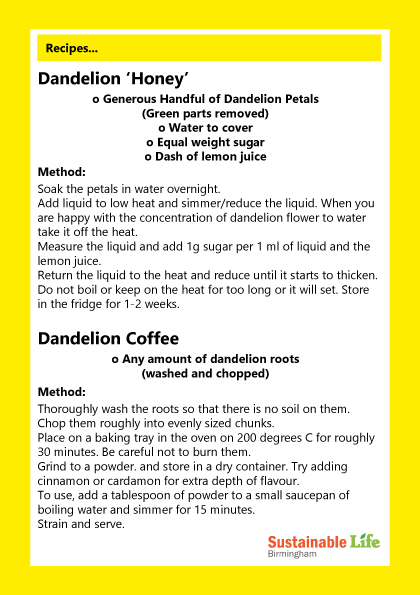
Here is the digital version of our September plant highlight for 2020 which was Common Dandelion!
This is exclusive member only content so if you can see this, it’s because you are a valued member of Sustainable Life Voluntary Organisation – so thank you!
Primrose! The lovely little five petal delicate flower we love to have in our gardens – is totally edible! Both leaves and flowers can be eaten, but Primrose tea is made from the leaves.
You can use the leaves fresh or dry them out and store them for future use.
Fill a tea strainer with leaves, and then let it steep in hot water for a few minutes. The water will turn a pale green colour. This tea tastes liek an everyday geenric herb tea – it doesn’t have any kind of real flavour to it. I added the primrose flowers to the top of my glass to liven it up a bit and improve the flavour and content. This means you get a wonderful nose full of the smell of flowers everytime you take a sip too, which is highly relaxing!
In the early days of medicine, the Primrosewas considered an important remedy in muscular rheumatism, paralysis and gout. The herb has sedative propoerties.
Not to be mistaken for other similar varieties and cross cultivators (evening primrose – also made into teas and tinctures, cowslip, oxlip).
While this is a picture of Yarrow on my allotment, I can assure you this plant grows everywhere and you are as likely to come across it as you are to find docks or dandelions. Often hidden in short grass the plant Yarrow can appear to be horizontal for most of the year only revealing itself by a few well trodden on curls of leaves in parks and pathway grass. However, at this time of year it also starts to grow upwards as it attempts to throw out some flowers and it can get very tall in the right location.
The leaves and flowers of Yarrow are used in salads and yarrow oil is also used in shampoo. Some people chew on yarrow to relieve toothache. In the garden it makes an excellent compost activator. Medicinal uses include easing the symptoms of fever, colds, gastrointestinal issues including IBS symptoms and to induce sweating.
WARNING: Do not consume excessive amounts, may contain thujone, cause drowsiness and increase urination. For some people, it can also cause a skin irritation.
WARNING: Not to be confused with Foxglove and Comfrey.
Foxglove – feel the leaves, are they soft and fur like? If so then you probably found foxglove before it flowered which is poisonous.
Comfrey – Flowers are purple instead of blue. Comfrey is the perrenial version of borage which is annual.
Borage works much like Comfrey in the compost bin as a brilliant plant stimulant for leafy growth. However, it is also considered an edible herb with tasty crisp leaves (if a bit furry). Some report they taste liek cucumber but I am less convinced. The flowers are also edible and as such make a brilliant garnish and addition to salad mixes.
Collected leaves and flowers from the borage plants on my allotment. Many garden shops now sell borage seeds to grow yourself and they excellent plants for attracting bees.
Borage leaves and flowers used to boost the contents and appearance of Elderflower cordial. I found that in this mixture the leaves slowly turn neon pink from the tips inward creating a pleasing and pretty drink garnish.
Collecting silver birch sap in the beginning of spring is a great way to get some extra sugar and clean water into your foraging diet. It does require some minor equipment and some thought and care though.
Equipment
Knife – sharp!
5L Bottle
Siphon Tube
Tape
Leaf and Twig or similar devices
Step One
Cut a “V” shape into a silver birch tree near the base but not at the bottom. If the sap begins to drip out rapidly, you are doing this at the right time.
Step Two
Insert the leaf into the base of the V shape and attach it in with a small twig. The sap should collect on the leaf and drip down at the point giving you a great way to direct the sap to where you want it. CAUTION: THIS WILL BE TRICKY!
Step Three
Attach the siphon tube to the tree underneath using non-permanent tape. Ensure the sap drips into the tube. Place the other end of the tube into the 5L bottle and tape securely in place. Use tape or other shade tools if you think it might rain to prevent rain water getting inside.
Step Four
Wait a couple of days for the bottle to fill up. This sap is clean, refreshing and a great emergency supply. You can also boil it down for syrup or make it into wine (which we will post about later on).
Remember:
Do this at the beginning of spring when the sap rises.
Try to look after the tree – seal the wound afterwards if possible and keep it clean.
Don’t keep doing this to the same tree, let it recover (some years).
The sap should be clear, sometimes with a tint. If it is brown it may be that the tree has a fungal infection and should be avoided.
Always seek permission form the tree owner of course.
Salt is one of our most important minerals for the human body but in the wild, it’s pretty hard to find in every day foraging. The coastal region is a massive resource for fresh salt whether it’s from the various food stuffs found from the coast or from harvesting the sea itself. Best of all, creating your own salt from the sea can be done all year round!
Salt isn’t as complicated and scary as you might first think. The way I will teach you how to produce your own salt from the sea today is pretty much exactly how large companies do it, there is no special secret you don’t know about.
Ingredients
Sea Water – Try to find a certified clean water area for the best and cleanest results!
Method
Collect around 5 Litres of sea water if possible. I used a large water bottle for this to get as much as I could.
Sift the Sea Water through several layers of Muslin. Repeat several times.
Allow the water to stand for a week and you may see a bit of excess dirt form on the bottom still. Siphon off the clean water from the top (as much as possible without disturbing the dirt at the bottom) using plastic tube (see homebrewing for help). Sieve through several layers of muslin again.
Boil off as much water as possible so that you are left with around 1 litre of water left at the most. Now your water beyond this point will begin to make salt so to avoid the salt burning on the bottom of the pan you should set up a gentle cooking system like this:
This is a large pan with around 30-50% water in it on the lowest heat setting on the hob. A metal bowl has placed on the top with the sea water in it. As you can see, after a few hours your water will disappear and you will be left with super strong salt! You may find your salt colour can vary from white to brown, it all depends on where you got the sea water from and the water quality. This salt has been produced from Morecambe and produced finer salt than I expected!
Next, loosen the salt form the edge of the bowl and leave it to air dry in a warm dry location like a windowsill. This will take a very long time but it prevents burning and allows the salt to dry properly for safe storage.
Japanese Knotweed is a pest species in the UK. It’s pretty prolific stuff and even the smallest scrap can spread and take over an area very quickly. Therefore, we stick to two points:
Eat the stuff – Anything to hinder it’s growth has to be a good thing.
Always be extremely careful when approaching. Do not tread on it, dispose of all scraps completely. The slightest peel, fibre or speck an spread and it’s actually illegal to do so.
Name: Japanese Knotweed
Location: Anywhere, prolific pest species
Months: March, April (and to a lesser extent throughout the year)
Edible Parts: New stalks or top 10cm of stalks
Non-Edible Parts: Anything else
The stalks of the knotweed are greeny/red in appearance and are hollow thick tubes. You can harvest the top 10 cm of the stalk throughout the year but the best time to harvest is March/April when completely new stalks start to emerge (harvest just like Asparagus).
To eat, peel and cook the stalks like a sweet treat. The flavour is slightly sweeter than rhubarb but has the same flavour. This makes it great in crumbles! Just like rhubarb, you shouldn’t eat it in large amounts so use as a spring time treat only.